|
Before you get started…
You will need: Matte Cutter with straight and beveled edge blade handles Matte board, pencil and ruler Images and an idea on how you want them to look
|
|
Instructions
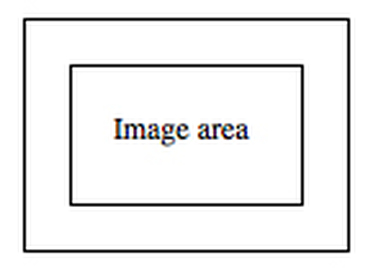
(1) Decide and measure the area you wish to see in the center area of the matte.
(3) Decide how wide you would like the boarders of your matte: 1 inch, 1 1/2 or 2 inch.
(4) Add DOUBLE that chosen width to BOTH dimensions of your image area - this will account for the same size boarder on all sides of the image and become the outer dimensions of the matte.
(5) Line up the STRAIGHT blade cutter on the silver rail so it moves easily and freely in the space provided.
(6) Cut the outer dimensions of the matte with the STRAIGHT blade handle using the ruler built into the bottom of the mate cutter – APPLY EVEN HEAVY PRESSURE AS YOU PULL TOWARDS YOU – do not let the board slip, repeat the cut as needed until you are fully through the board.
(7) Using a ruler measure and mark in PENCIL the width of the boarder on all 4 SIDES of the matte board – BE SURE TO WRITE ON THE BACK OF THE MATTE BOARD!
(8) Using the 90 degree angle of the matte cutter, line up your marks with the side and fit the board snugly to the bottom guide and draw a straight guideline for cutting the inside area.
(9) In PENCIL, continue rotating the board and creating guidelines for the inside on all 4 sides of the board. (see step 8)
Switch to the BEVELED EDGE blade handle to complete the inside "window" of the matte
(10) Line up the guideline for the interior cuts with the rail and set the beveled blade into place on the rail above the your first interior guideline
(11) There is a perpendicular line on the blade itself – that is the guide for where the blade will begin cutting.
(12) Line up the guide on the blade with the marks you made for cutting so that you will be cutting from TOP to BOTTOM.
(13) Push the silver pin at the top of the cutter – this will push out a small tack that will prevent the board from slipping as your set the bevel blade into the matte board -- as you gently set the blade in to place to begin cutting.
(14) RELEASE the pin BEFORE you start pulling down to cut -- while still holding the blade down into place in the matte board
(15) Pull towards you from the top guideline to the bottom – stopping at the next or bottom guideline.
(16) Release the blade from the matte board – sometimes it sticks.
(17) ROTATE the board CLOCKWISE or COUNTER CLOCKWISE and repeat steps 3-5 until you have cut out the entire center area of the board.
(18) Be careful not to over cut your board and watch that the blade does not loosen over time.
- Matting to against the edge of the image area will require you to measure between 1/8 and1/4 inch to the INSIDE of the image to allow for the matte to overlap properly.
- Matting with a white boarder will require you to determine how much white you would like to show AROUND the image and include that amount into the dimensions o f your image area measurement.
(3) Decide how wide you would like the boarders of your matte: 1 inch, 1 1/2 or 2 inch.
(4) Add DOUBLE that chosen width to BOTH dimensions of your image area - this will account for the same size boarder on all sides of the image and become the outer dimensions of the matte.
(5) Line up the STRAIGHT blade cutter on the silver rail so it moves easily and freely in the space provided.
(6) Cut the outer dimensions of the matte with the STRAIGHT blade handle using the ruler built into the bottom of the mate cutter – APPLY EVEN HEAVY PRESSURE AS YOU PULL TOWARDS YOU – do not let the board slip, repeat the cut as needed until you are fully through the board.
(7) Using a ruler measure and mark in PENCIL the width of the boarder on all 4 SIDES of the matte board – BE SURE TO WRITE ON THE BACK OF THE MATTE BOARD!
(8) Using the 90 degree angle of the matte cutter, line up your marks with the side and fit the board snugly to the bottom guide and draw a straight guideline for cutting the inside area.
(9) In PENCIL, continue rotating the board and creating guidelines for the inside on all 4 sides of the board. (see step 8)
Switch to the BEVELED EDGE blade handle to complete the inside "window" of the matte
(10) Line up the guideline for the interior cuts with the rail and set the beveled blade into place on the rail above the your first interior guideline
(11) There is a perpendicular line on the blade itself – that is the guide for where the blade will begin cutting.
(12) Line up the guide on the blade with the marks you made for cutting so that you will be cutting from TOP to BOTTOM.
(13) Push the silver pin at the top of the cutter – this will push out a small tack that will prevent the board from slipping as your set the bevel blade into the matte board -- as you gently set the blade in to place to begin cutting.
(14) RELEASE the pin BEFORE you start pulling down to cut -- while still holding the blade down into place in the matte board
(15) Pull towards you from the top guideline to the bottom – stopping at the next or bottom guideline.
(16) Release the blade from the matte board – sometimes it sticks.
(17) ROTATE the board CLOCKWISE or COUNTER CLOCKWISE and repeat steps 3-5 until you have cut out the entire center area of the board.
(18) Be careful not to over cut your board and watch that the blade does not loosen over time.
